We need to divide our page into nested rectangular areas. We are going to work backwards, starting from our desired final webpage, as sketched on a piece of paper. Then we start defining areas, like this:
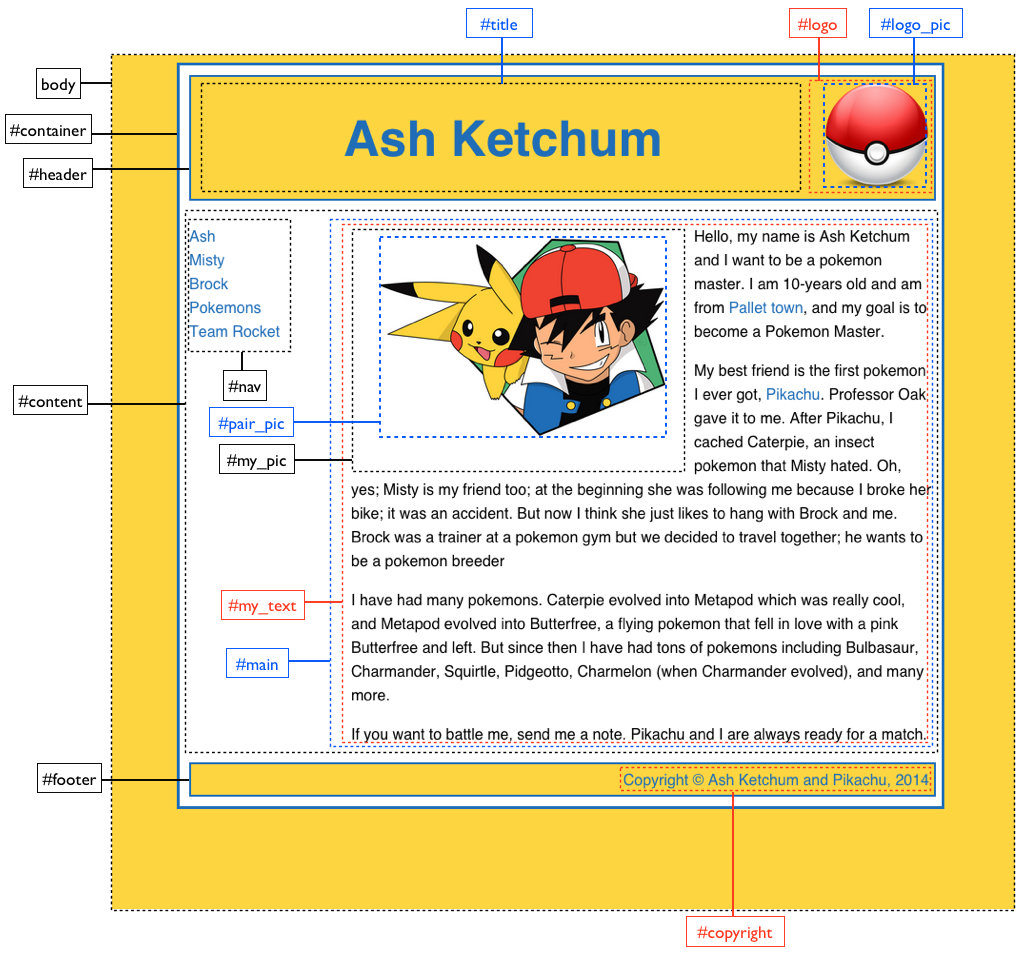
The areas are general containers. For example, we have the area called “#container” that contains three sub-areas: ‘#header’, which has the content of the header; ‘#content’, which has the content of the page; and ‘#footer’, which has the content of the footer. As another example, ‘#content’ has only two sub-areas: ‘#nav’, which has the navigation menu, and ‘#main’ that has all the text and images. Our actual content, i.e., the text, images, and links, (all drawn in red) will show up at the leaves of our tree of nested areas:
- body
- #container
- #header
- #title
- #logo
- #logo_pic
- #content
- #navigation
- #main
- #my_pic
- #pair_pic
- #my_text
- #my_pic
- #footer
- #copyright
- #header
- #container
The point of having all these nested areas is that later, when we use Cascade Style Sheets, we will be able to define the style of specific areas. For example, we could change the color of all the page changing the color of the ‘#body’ area, or we could just change the color of the footer, by changing the color of the ‘#footer’ area.
Now that our structure is organized, we map the structure to our script using the ‘division’ element, whose role is to split the webpage into specific areas, i.e., it is tailor-made to reflect the page structure. We map the page structure that we just wrote into our template’s body like so:
<!DOCTYPE html>
<html lang="en-US">
    <head>
        <meta charset="UTF-8" />
        <link rel="stylesheet" type="text/css" href="style.css" />
        <script src="script.js"></script>
        <title>My first HTML page</title>
    </head>

    <body>
	<div id="container">
		<div id="header">
			<div id="title">
			</div>
			<div id="logo">
			</div>
		</div>
		<div id="content">
			<div id="nav">
			</div>
			<div id="main">
				<div id="my_pic">
				</div>
				<div id="my_text">
				</div>
			</div>
		</div>
		<div id="footer">
			<div id="copyright">
			</div>
		</div>
	</div>
    </body>
</html>
Each division has an identification label that we can use to address that division specifically from CSS.
Since we replaced our dummy ‘Hello, World!’ text from the body of the page, with empty divisions, the page itself is now empty, but it is functional and is ready to receive content:
Empty webpage with page structure ready to receive content Click on the image to go to the working page
Now that we have the structure of the webpage in place, let’s add the text content.